

Introduction
Are you looking to make your own delicious yogurt from the comfort of your own home? Making your own yogurt is easier than you think! With a few simple ingredients and some patience, you can make your own yogurt from scratch. In this blog post, we’ll go over the basics of how to make yogurt, as well as some tips and tricks for making it perfectly every time. So let’s get started on making your own yogurt with this DIY Delicious guide!
The Benefits of Making Your Own Yogurt
Making your own yogurt at home comes with a multitude of benefits that you won’t want to miss out on. First and foremost, by making your own yogurt, you have complete control over the ingredients you use. This means you can choose high-quality milk, organic sweeteners, and fresh fruits to create a yogurt that suits your preferences and dietary needs.
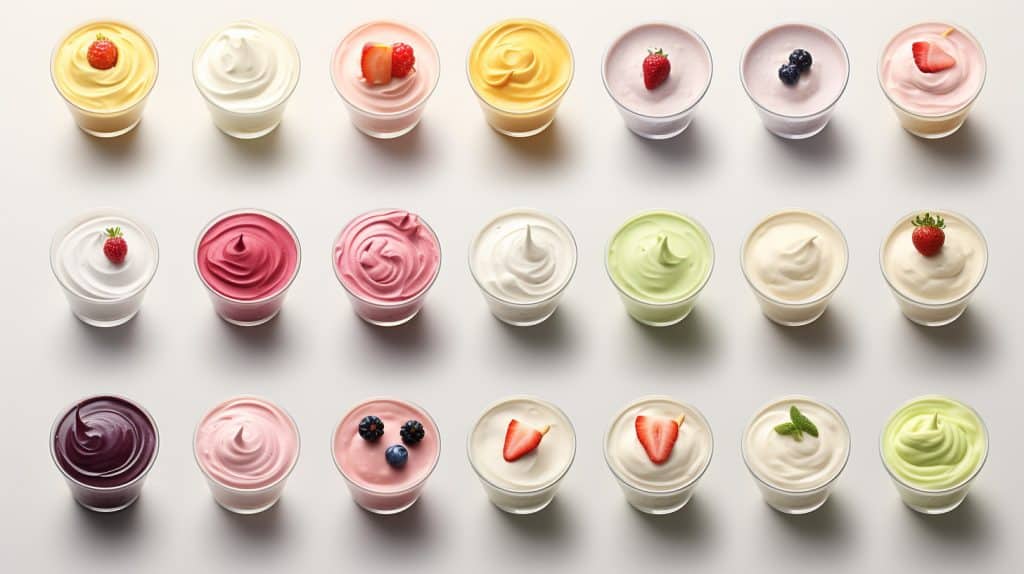
Additionally, making your own yogurt allows you to experiment with different flavors and variations. From tangy Greek yogurt to creamy and indulgent dessert-like yogurts, the possibilities are endless. You can also customize the sweetness and add your favorite mix-ins, such as granola, nuts, or chocolate chips, to make it truly your own.
Not only is homemade yogurt delicious, but it is also cost-effective. Store-bought yogurt can quickly add up in cost, especially if you consume it regularly. By making your own yogurt, you can save money in the long run while still enjoying a delicious and healthy snack or breakfast option.
Furthermore, homemade yogurt is often free from artificial additives, preservatives, and unnecessary sugars. This means you can feel good about consuming it and nourishing your body with probiotics and essential nutrients.
Lastly, the process of making your own yogurt can be a rewarding and satisfying experience. It allows you to connect with your food, be more self-sufficient, and create something wholesome and nourishing for yourself and your loved ones.
Ingredients and Tools You Need To Make Your Own Yogurt

- Making your own yogurt at home requires just a few simple ingredients and tools. Here’s what you’ll need to get started on your yogurt-making adventure.
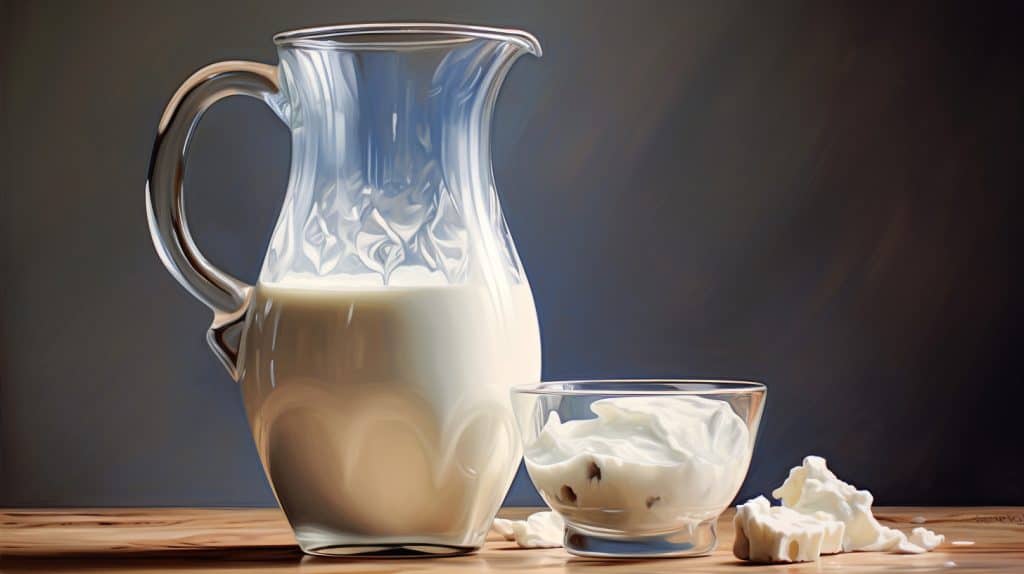
- First and foremost, you’ll need milk. Any type of milk can be used to make yogurt, whether it’s whole milk, skim milk, or even plant-based milk like almond or soy milk. Just keep in mind that the fat content of the milk will affect the creaminess and texture of the final yogurt.
- Next, you’ll need a starter culture. This can be store-bought yogurt that contains live and active cultures, or you can use a yogurt starter culture specifically made for yogurt-making. These cultures are responsible for fermenting the milk
 and turning it into yogurt.
 - In addition to milk and starter culture, you’ll also need a large pot or saucepan for heating the milk, a thermometer to monitor the temperature, and a whisk or spoon for stirring. It’s important to heat the milk to the correct temperature to ensure proper fermentation.
- To incubate the yogurt, you’ll need a container with a tight-fitting lid. This can be a glass jar, a plastic container, or even a yogurt maker if you have one. The container should be able to hold the desired amount of yogurt you want to make.
- Lastly, you’ll need patience and a clean kitchen! Yogurt-making is a process that requires time and attention, so make sure you have enough time set aside to complete the yogurt-making process from start to finish.
- With these ingredients and tools, you’re ready to embark on your yogurt-making journey. So gather your supplies, and let’s get started on making your very own delicious yogurt!
Choosing the Right Milk
When it comes to making your own yogurt, choosing the right milk is crucial. The type of milk you use will greatly impact the taste, texture, and creaminess of your homemade yogurt.
One of the first decisions you’ll need to make is whether to use dairy milk or a plant-based alternative. If you prefer dairy, you have a variety of options to choose from, such as whole milk, skim milk, or even low-fat milk. Each type of milk will result in a slightly different yogurt consistency, with whole milk producing a creamier and richer yogurt.
For those who follow a vegan or lactose-free diet, plant-based milk is a great alternative. Almond milk, soy milk, and coconut milk are popular choices for making dairy-free yogurt. Keep in mind that plant-based milk may result in a thinner yogurt compared to dairy milk, so you might need to thicken it with a thickening agent like tapioca starch or agar-agar.
When selecting your milk, opt for high-quality, organic options whenever possible. This will ensure that your DIY yogurt is free from any unwanted additives or hormones that may be present in conventional milk.
Overall, the choice of milk is a personal preference and may require some experimentation to find the perfect combination for your taste buds. So grab your DIY Yogurt hat and get ready to experiment with different types of milk to find your ideal yogurt recipe!
Heating the Milk To Make Your Own Yogurt

Heating the milk is a crucial step in the yogurt-making process. This step helps to kill any harmful bacteria that may be present in the milk and also prepares it for fermentation. Here’s how to properly heat the milk for making yogurt.
Start by pouring the desired amount of milk into a large pot or saucepan. You can use any type of milk you prefer, whether it’s dairy or plant-based. Remember that the fat content of the milk will affect the final consistency of your yogurt.
Place the pot over medium heat and slowly bring the milk to a gentle boil. Stir the milk occasionally to prevent it from scorching on the bottom. You’ll want to heat the milk until it reaches a temperature of about 180°F (82°C). Using a thermometer is highly recommended to ensure accuracy.
Heating the milk to this temperature serves two purposes. First, it helps to denature the proteins in the milk, which will result in a thicker yogurt. Second, it eliminates any potential pathogens that may be present in the milk.
Once the milk has reached the desired temperature, remove it from the heat and let it cool down to about 110°F (43°C). This temperature is ideal for adding the yogurt starter culture, as it creates the optimal environment for the strains of bacteria to ferment and convert the milk into yogurt.
Heating the milk properly is an important step in making your own yogurt. It sets the stage for fermentation and ensures that you end up with a delicious and safe final product. So be sure to follow these guidelines and heat your milk with care for the best homemade yogurt possible.
Adding Starter Culture
Now that your milk has reached the ideal temperature, it’s time to add the starter culture to kickstart the fermentation process. The starter culture contains live and active bacteria strains that will transform the milk into delicious yogurt.
To add the starter culture, simply whisk in about 2-3 tablespoons of store-bought yogurt or the yogurt starter culture that you purchased specifically for yogurt-making. Make sure the starter culture is evenly distributed throughout the milk.
The yogurt starter culture contains specific strains of bacteria that are necessary for fermentation. These strains will convert the lactose in the milk into lactic acid, which gives yogurt its tangy flavor and thick consistency. The bacteria will also produce carbon dioxide, which helps create a creamy texture.
Once the starter culture is mixed in, cover the pot with a lid and wrap it with a clean kitchen towel or blanket to insulate the heat. This will create the perfect environment for the yogurt to incubate and ferment.
Allow the yogurt to sit undisturbed at room temperature for about 6-8 hours, or until it reaches your desired level of tanginess and thickness. Keep in mind that the longer the yogurt ferments, the tangier and thicker it will become.
The addition of the starter culture is a crucial step in the yogurt-making process. The specific strains of bacteria in the starter culture are what transform the milk into creamy, tangy yogurt. So be sure to choose a high-quality starter culture or use a reliable store-bought yogurt as your starter.
Incubating the Yogurt
Once you’ve added the starter culture to your milk, it’s time for the magical process of incubation. This is when the yogurt really starts to take shape and develop its signature tanginess and thickness.
To incubate your yogurt, you’ll want to keep it at a consistently warm temperature for a period of time.
This allows the beneficial bacteria in the starter culture to do their job of fermenting the lactose in the milk and turning it into lactic acid. The lactic acid is what gives yogurt its distinctive tangy flavor.
There are a few methods you can use to incubate your yogurt. One option is to simply wrap the pot in a clean kitchen towel or blanket and leave it undisturbed on your kitchen counter. This allows the natural heat from the fermentation process to keep the yogurt warm.
Another option is to use a yogurt maker. These machines provide a controlled and consistent temperature for the yogurt to ferment. Simply follow the manufacturer’s instructions for setting the temperature and time.
Regardless of the method you choose, the yogurt should be left to incubate for about 6-8 hours. This gives the yogurt strains enough time to work their magic and create that creamy and tangy goodness you’re craving.
Remember, the longer you incubate the yogurt, the tangier and thicker it will become. So feel free to adjust the incubation time to suit your personal taste preferences.
Now that you’ve incubated your yogurt, it’s time to move on to the next step: straining (optional).
Straining the Yogurt (Optional)

After incubating your yogurt for the desired amount of time, you have the option to strain it to achieve a thicker consistency. Straining removes some of the whey from the yogurt, leaving you with a velvety and creamy texture that is perfect for spreading, topping, or enjoying on its own.
To strain your yogurt, you will need a few extra tools. First, you’ll need a fine-mesh sieve or cheesecloth. Place the sieve over a large bowl or container to catch the whey as it strains. If you’re using cheesecloth, line the sieve with it for added filtration.
Carefully pour your incubated yogurt into the sieve or onto the cheesecloth. The whey will slowly drain through, while the thicker yogurt will be left behind. Let it strain for a minimum of 2-4 hours, or overnight if you prefer an even thicker consistency.
Once strained, you can transfer your yogurt to a container and store it in the refrigerator. The whey that was collected can be saved and used for other purposes, such as in smoothies, baking, or as a marinade.
Remember, straining the yogurt is optional and depends on your personal preference. If you enjoy a thinner consistency, you can skip this step and move on to flavoring and storing your yogurt.
Flavoring and Storing Your Homemade Yogurt

Now that you have successfully made your own homemade yogurt, it’s time to add some flavor and think about how to store it. The great thing about making your own yogurt is that you can customize it to your liking. Here are some tips for flavoring and storing your homemade yogurt.
When it comes to flavoring your yogurt, the possibilities are endless. You can add a variety of ingredients to enhance the taste and create different flavor profiles. For a simple and classic flavor, you can add a drizzle of honey or maple syrup, along with some fresh berries or sliced fruit. If you prefer a more indulgent option, you can mix in some chocolate chips or crushed cookies for a dessert-like treat.
Another option is to experiment with spices and extracts. A dash of cinnamon or a drop of vanilla extract can add depth and warmth to your yogurt. You can also get creative with toppings such as nuts, granola, or shredded coconut for added texture and flavor.
Once you have flavored your yogurt to your liking, it’s time to store it properly. Transfer your yogurt into clean and airtight containers, such as glass jars or plastic containers with tight-fitting lids. Make sure to label the containers with the date of preparation to keep track of freshness.
It’s important to store your homemade yogurt in the refrigerator to maintain its freshness and quality. Yogurt can be stored in the refrigerator for up to 1-2 weeks, but it’s best to consume it within the first week for optimal taste and texture.
Remember always to use clean utensils when scooping out yogurt to prevent any contamination. If you notice any signs of spoilage, such as a sour smell or unusual texture, it’s best to discard the yogurt.
Now that you know how to flavor and store your homemade yogurt, you can enjoy your delicious creation whenever you want. Whether it’s for breakfast, a snack, or a dessert, your homemade yogurt will surely be a hit with family and friends. So go ahead, get creative, and enjoy the delightful taste of your own homemade yogurt!
Conclusion
Making your own yogurt at home is a rewarding and fulfilling experience. By taking control of the ingredients and process, you can create a delicious and healthy yogurt that suits your taste buds and dietary needs.
Throughout this DIY Deliciousness: How to Make Your Own Yogurt guide, we have explored the benefits of making yogurt at home, the essential ingredients and tools you need, and the step-by-step process for creating your own yogurt. We’ve covered everything from choosing the right milk to adding the starter culture and incubating the yogurt.
By making your own yogurt, you can enjoy a range of benefits, including the ability to customize flavors and variations, save money, and avoid unnecessary additives and preservatives. You can also feel a sense of accomplishment and connection to your food as you create something nourishing for yourself and your loved ones. So make your own yogurt & start seeing the benefits.
So, put on your DIY Yogurt hat and get ready to embark on this yogurt-making adventure. With the knowledge and tips shared in this guide, you are well-equipped to make your own yogurt from scratch. So gather your ingredients, tools, and patience, and start creating your own homemade yogurt today. It’s time to indulge in the delightful taste of your very own yogurt!
Read: Munching on Yogurt Can Improve Cholesterol and Other Surprising Benefits
Recent Posts
Introduction Finding a healthy and delicious snack for your baby can be a challenge. With so many yogurt options on the market, it can be overwhelming to determine what yogurt for babies is best...
Why Yogurt Is a Diabetes Superfood, Help Control Blood Sugar Levels.
Introduction Yogurt is a delicious and nutritious snack that all can enjoy. But did you know that it is also a diabetes-friendly food? Eating the right kind of yogurt can help people with diabetes...
One thought on “DIY Deliciousness: How to Make Your Own Yogurt Complete Guide”